


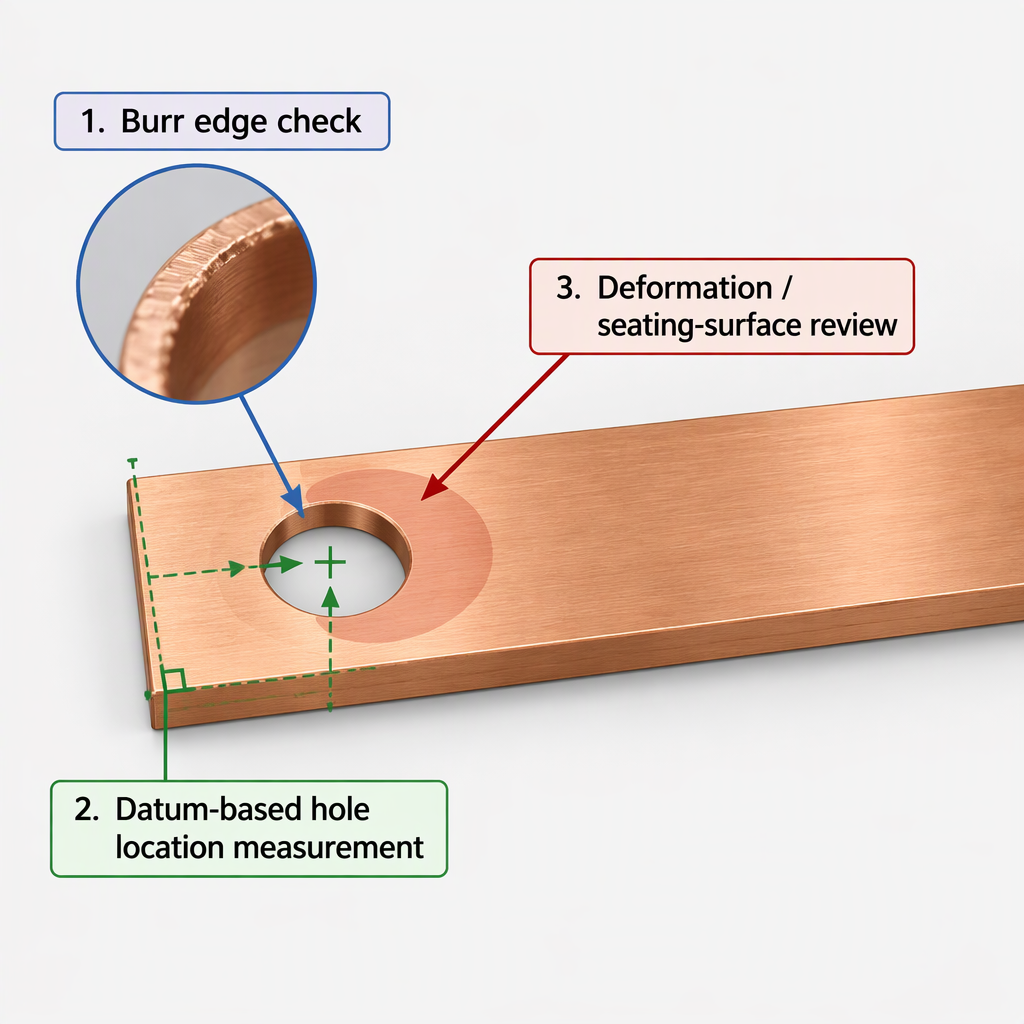
Inspect punched busbar holes as connection features, not cosmetic details: check the edge for burrs, verify hole location from the drawing datum, and look for deformation around the bolted contact area before accepting parts for switchgear or busbar assembly.
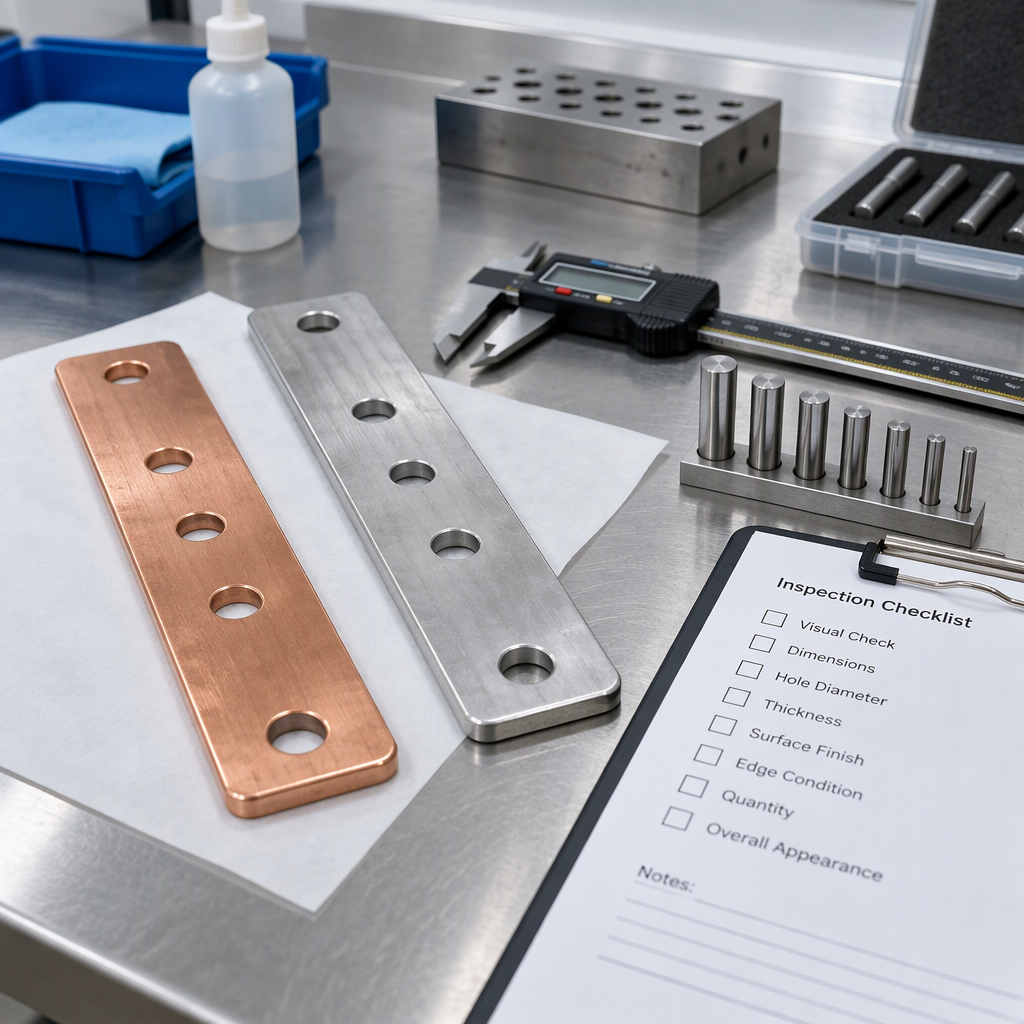
Use traceable measurement practice for dimensional checks and keep acceptance limits tied to the drawing, material specification, and customer quality plan rather than to a universal punched-hole value.
Why punched busbar hole quality matters
Punched-hole quality matters because the hole edge and nearby material are part of the bolted electrical connection, where local material effects can influence resistance and durability.
An academic record on aluminum and copper electric busbar punching for bolt connections connects the punching process with material properties around the hole and with connection resistance and durability; buyers can review the AGH BaDAP publication record for that scope.
Do not treat a clean-looking hole as automatically acceptable. The inspection should separate three questions: whether the edge has burrs that can interfere with seating, whether the hole is in the specified location, and whether the punched area remains flat enough for the intended washer, bolt, spacer, or laminated busbar stack.
Inspect loose, de-energized parts on a stable bench. If any check requires reaching into a punch, press, powered fixture, or guarded machine area, switch off and disconnect the relevant power source before manual access, then follow the machine manual and site safety procedure; do not bypass guards.
How to check punched busbar holes for burrs
Check burrs by inspecting both faces of the busbar hole, identifying the punch-exit side, and comparing the edge condition with the drawing or customer acceptance rule.
- Clean the inspection area. Remove loose chips or handling dirt so the edge condition is visible, while avoiding any abrasive action that could hide the original punched condition.
- Inspect both faces. Look at the punch-entry and punch-exit sides because burrs usually need to be judged where the material has fractured or sheared around the hole.
- Use a protected tactile check only as a screen. Do not run a bare finger over a punched edge; use a cloth, deburring gauge, or other suitable inspection aid with appropriate hand protection to detect a raised edge, and record acceptance against the specified burr limit or documented visual criterion.
- Check the connection surface. Focus on burrs that can keep washers, lugs, spacers, or overlapping busbars from seating evenly around the hole.
- Record the disposition. Mark whether the part is accepted, deburred under an approved process, or held for engineering review.
Burr acceptance is specification-dependent. If the drawing does not state a burr height, edge-break rule, plating condition, or post-punch deburring requirement, ask for those criteria before comparing suppliers or releasing production.
How to measure punched-hole location
Measure punched-hole location from the specified datum using calibrated instruments, a defined inspection setup, and records that show the measurement basis rather than visual alignment alone.
- Confirm the datum scheme. Identify whether the drawing controls the hole from an end face, bend line, edge, centerline, pattern datum, or mating assembly feature.
- Select the measurement method. Use a method suitable for the tolerance, such as pin gauges with a fixture, a height gauge on a surface plate, optical measurement, or coordinate measurement for tighter patterns.
- Control the setup. Support the busbar so bow, twist, or burr lift does not shift the apparent hole center during measurement.
- Measure the pattern, not only one hole. For continuous holes, check pitch, end distance, edge distance, and pattern relationship to bends or connection zones according to the drawing.
- Keep traceable records. Record instrument identity, calibration status, datum used, measured values, and acceptance decision.
NIST describes dimensional measurement in terms of traceability to the SI unit of length, high-accuracy dimensional measurement, coordinate and vision measurement capabilities, and uncertainty-focused metrology; these principles support using a controlled, traceable measurement process for punched-hole location. See NIST Dimensional Measurement Services.
How to inspect deformation around the hole
Inspect deformation by checking whether the punched area has local raised lips, cupping, bow, or contact-surface distortion that could affect the bolted busbar joint.
| Inspection focus | What to look for | Buyer action |
|---|---|---|
| Local lip around the hole | Raised material that may hold a washer, spacer, or mating busbar away from the surface | Ask whether deburring, coining, flattening, or another approved finishing step is included. |
| Cupping or dish shape | A contact area that is no longer flat around the bolt hole | Require a flatness or seating criterion on the drawing or inspection plan. |
| Pattern shift caused by distortion | Hole centers that appear different when the bar is unsupported versus properly supported | Define the inspection support condition and datum before accepting the measurements. |
| Cracks or severe tearing | Visible fracture beyond the normal punched edge zone | Hold the part for engineering review rather than treating it as a simple burr issue. |
A flatness or deformation check should not be reduced to a casual visual glance when the assembly depends on a stable bolted contact. Define the measuring tool, support method, and acceptance rule before comparing quotations.
What to request before quotation or incoming inspection
Before quotation or incoming inspection, request the drawing-controlled acceptance criteria, measurement method, and sample report format for burrs, hole location, and deformation.
- Material grade, temper or condition, thickness, coating or plating requirement, and whether the part is copper or aluminum.
- Drawing datums for each hole pattern, including edge distance, pitch, bend relationship, and connection-zone requirements.
- Burr acceptance rule, including whether deburring is required before plating, after plating, or not permitted on a specified surface.
- Measurement equipment and calibration basis for hole diameter, position, pitch, and pattern checks.
- Inspection report fields: part number, revision, lot, instrument, operator or inspector, measured values, and acceptance decision.
- Disposition path for nonconforming holes: rework allowed, engineering concession required, or reject-and-remake.
| If the buyer needs... | Ask the supplier for... | Why it matters |
|---|---|---|
| Stable bolted seating | Burr and deformation acceptance criteria | The punched area is part of the bolt-connection region, where local material effects matter. |
| Repeatable assembly fit | Datum-based hole-location report | Traceable dimensional measurement is stronger than visual fit-up judgment alone. |
| Comparable quotations | Same drawing revision and same inspection scope from each supplier | Quotations are not comparable when one includes deburring, inspection records, or rework control and another does not. |
Final punched-hole quality checklist
A practical busbar punching hole quality checklist should combine edge condition, datum-based location, deformation review, traceable records, and clear RFQ inputs.
- Burrs checked on both sides of each punched hole, especially on the exit side and connection seating surface.
- Hole location measured from the correct datum, with the inspection setup recorded.
- Pitch, edge distance, end distance, and relationship to bends or mating parts checked where the drawing requires them.
- Local deformation, raised lips, cupping, tearing, or contact-surface distortion reviewed around the hole.
- Measuring instruments selected for the tolerance and recorded with calibration status.
- Drawing revision, material condition, coating stage, deburring rule, and nonconformance disposition confirmed before production release.
For procurement, the safest comparison is not simply who can punch holes fastest. Compare whether each supplier is quoting the same drawing revision, inspection scope, deburring expectation, measurement record, and rework rule.
Conclusion
Punched busbar holes should be accepted only after burrs, location, and local deformation have been checked against the drawing and documented inspection plan.
For buyers of copper or aluminum busbars, a reliable inspection request is specific: name the datum, the measuring method, the burr rule, the deformation criterion, and the record format. That approach keeps busbar punching hole quality tied to assembly fit and connection function instead of to vague visual approval.
FAQ
These questions help process engineers and procurement teams turn punched-hole inspection into clear purchasing requirements.
What is the minimum spacing between continuous punched holes on a busbar?
The spacing should come from the drawing, current path, bolting hardware, material thickness, bend layout, and assembly requirement. Do not use a universal spacing value unless the applicable design standard, customer specification, or engineering drawing states it.
Can a visual inspection alone approve punched busbar holes?
Visual inspection can screen burrs and obvious damage, but hole location and pattern fit should be checked with an appropriate dimensional measurement method when the drawing controls those features.
Should copper and aluminum busbars be checked differently?
Both should be checked for burrs, location, and deformation because punched-hole quality is relevant to copper and aluminum busbar bolt connections. The actual limits should follow the material specification and drawing.
What should be recorded for hole-location inspection?
Record the datum, measurement method, instrument, calibration status, measured values, drawing revision, lot or part number, and accept or reject decision.
Is deburring always allowed after punching?
No. Deburring depends on the drawing, coating stage, edge requirement, and customer quality plan. Ask whether deburring is required, optional, or prohibited on contact surfaces before production.
What makes deformation around the hole a purchasing issue?
Local deformation can affect how the bolted connection area seats, so procurement should request a defined inspection and disposition rule rather than relying only on a photograph of the hole.
What should I ask a supplier before quoting punched busbars?
Ask for the drawing revision, material and thickness range, burr and deformation criteria, measurement method, inspection report sample, coating sequence, and nonconformance handling rule.
